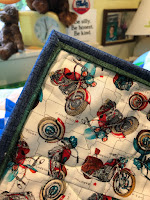
I make a lot of quilts. Each one is unique in that each one is made for someone special. Might be a family member. Might be a friend. Might be for a child in the hospital. Might be a homeless stranger in need of warmth and love. See, my philosophy is that every quilt I make puts out a bit of positive energy into the world. I keep making quilts because the world needs more positive energy.
Quilts are also pieces of art. It is created through choices: a choice of fabrics, patterns, of stitching. Even the most simple quilt, sewn together by someone with little skill becomes a piece of art. It is beautiful! The borders that surround the piecing is a type of frame; it gives the center the crown of glory. But the binding, that small piece of fabric that surrounds the outer edges, is the piece that brings and holds it all together.
How about adding a little fun to that piece? I learned how to make a flange/piping on the binding from fabric artist Melody Crust. It's fun and easy. As someone recently said, it is just adding a little step to regular binding. Here's the deal: The binding is added to the quilt when it is finished, meaning after the top has been sandwiched with the batting and the backing and then quilted. The raw edges are then wrapped with fabric that binds it all together. The binding can be any width but the most common size is 2.5" by area of the quilt (plus 15"-20"). That's the size I will show you in making the flange.
To make the flange:
- The piping cut 1.3/4" wide
- The binding cut 1.3/8" wide
Sew both strips together using 1/4" seam. Press the seam toward the binding fabric. Then fold in half and press.
With binding side down, place the binding onto the back of the quilt. Using a walking foot or something else that will enable the even-feed feature on your sewing machine, sew the binding onto the back. Keep the raw edges together. Don't forget to start sewing with about an 8"-10" tail at the beginning.
Turn the corners the same as you would turn the regular binding. Stop stitching 1/4" from edge, fold up to create a 45 degree angle toward the corner, then fold the strip down with folded edge aligned with the top of the corner. Resume stitching :)
When you get to the first end, stop at least 8"-10" between the first start. This will give you room to attach your ends together. A great way to end the binding so that it fits snugly is to use a clipping of the binding itself, snip snip...create a little hat... sew... measure...and sew down.
Now you wrap the binding to the front and sew down along in the ditch between the binding and the flange. Pretty cool, huh?
You will have a stitch line on the back along the edge of the binding seam. This is why I tend to use the same color thread in the bobbin as the quilting thread.
Piping and flange. It's easy and fun.


I sure enjoyed my time in your group quilting with all of you. Thank you for all the creative fun and good memories. Love this binding. ~ Maggie
ReplyDelete